
Phone book
Own numbers—Display the phone number assigned to your phone, if the
number is saved to the SIM card by your wireless provider.
Caller groups—Setup a caller group. You can define ringing tones and
graphics for up to five groups in your phone book. See “Caller groups” on
page 37 to set up a caller group.
• USE THE PHONE BOOK
Add an entry to the phone book
1
At the start screen, select Names > Add entry.
2
Enter a name for the entry and select OK.
3
Enter the area code and number for the entry and select OK.
The name and number are saved to the memory in use.
OR
1
At the start screen, enter the area code and number you wish to save
and select Options > Save.
Tip: Always save numbers with a plus (+) in front to simplify
international dialing. See “International dialing” on page 58 for
more information.
2
Enter a name for the number and select OK.
The name and number are saved to the memory in use.
Assign or change number types
Phone numbers are subentries of an entry, or a name. Each entry can
hold multiple numbers, and you can assign a different type to each.
Once assigned, a number type is easily identified by the icon to the left
of the number. The following number types are available:
General
Mobile
Home
Work
Fax
6340i.ENv1_9310019.book Page 31 Thursday, July 10, 2003 3:21 PM

[ 32 ]
Note: If you plan on using Nokia PC Sync to synchronize your
phone book and your PC PIM (personal information manager)
application, make sure all phone numbers are assigned the correct
number type. PC Sync uses this information to synchronize
contacts correctly between phone and PC.
This function is not available for numbers stored only on your SIM card.
1
At the start screen, press one of the scroll keys to display your phone
book entries.
2
Scroll to the entry containing the numbers you wish to change and
select Details.
3
Use the scroll keys to highlight the number you wish to change and
select Options > Change type.
4
Select the number type of your preference.
A confirmation message appears in the display.
Add an address or note to a phone book entry
Note: This function is not available for numbers stored only on
your SIM card.
1
With an entry in your phone book highlighted, select Details >
Options > Add detail.
2
Select either E-mail, Web address, Street addr., or Note.
3
Enter the address or note and select OK.
4
Select Back to return to the phone book entry.
Save a number (only)
1
At the start screen, enter the area code and number you want to save.
2
Select and hold Options.
The number is saved to your phone book as a stand-alone entry.
6340i.ENv1_9310019.book Page 32 Thursday, July 10, 2003 3:21 PM
[ 33 ]
Phone book
Display phone book entries quickly
Display any entries in your phone book with the press of a key. Just press
one of the scroll keys at the start screen.
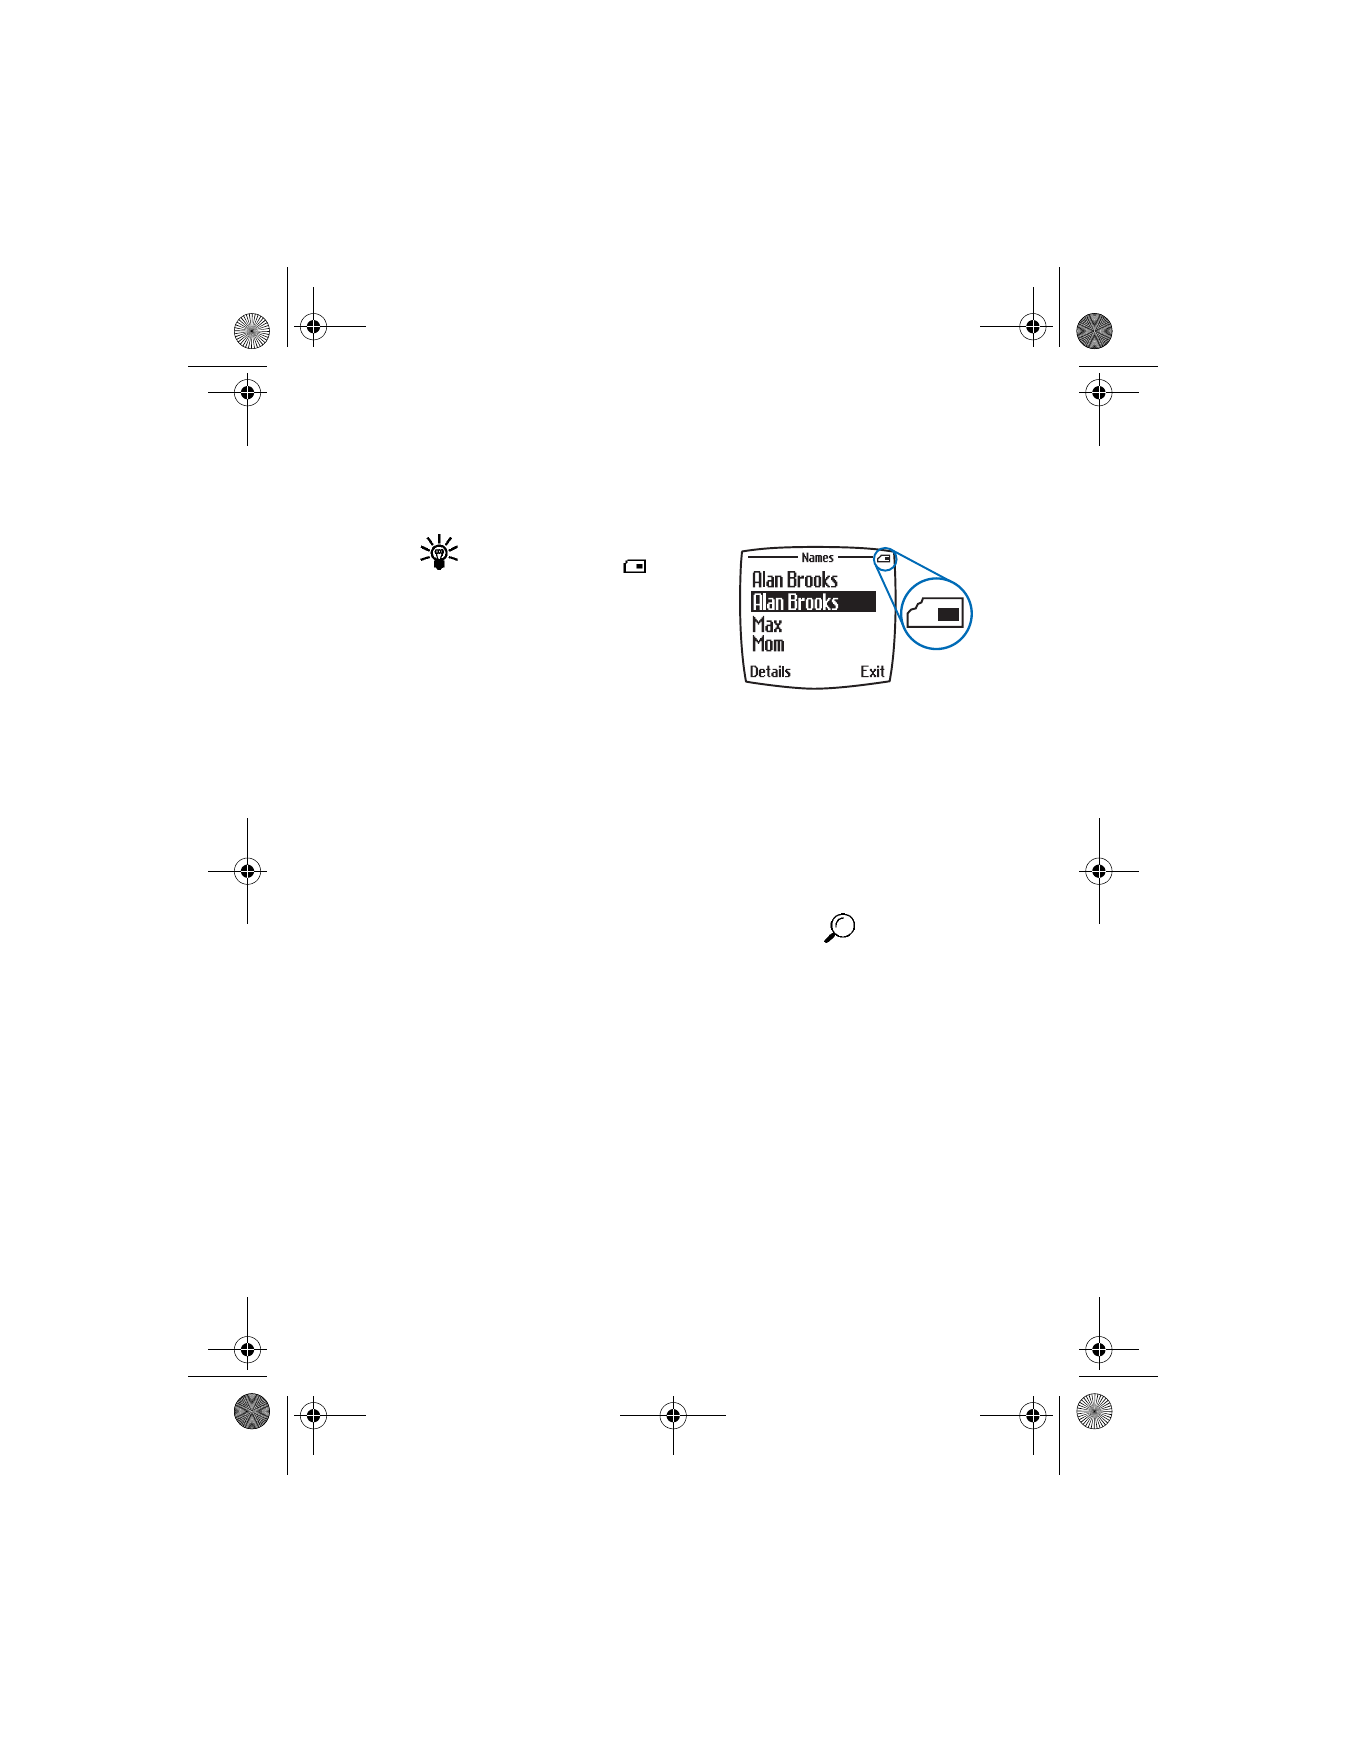
Tip: Any entries which display
the SIM card icon (
) in the
upper right corner of the display)
indicate that entry is saved to the
SIM card.
Any entries which appear twice in the
display (as in this illustration), indicate
the entry is saved to both phone memory and SIM memory.
Search the phone book quickly
1
At the start screen, press one of the scroll keys to display any entries
in your phone book.
2
Press the key which contains the first letter of the entry you are
searching (for example, press the 3 key twice to search for “Evelyn”).
Any entries that begin with that letter appear in the display, as well
as a search box with the magnifying glass icon (
).
3
Continue entering letters to locate the entry, or move through and
highlight other entries using the scroll keys.
4
Once you have highlighted the desired entry, press the Talk key to dial
the number.
OR
Select Details > Options to display the following options:
Add voice tag—Add a voice tag to the highlighted entry.
Edit number—Edit the highlighted number.
Delete number—Delete the highlighted number.
Copy number—Copy the highlighted number.
View—View the highlighted number.
6340i.ENv1_9310019.book Page 33 Thursday, July 10, 2003 3:21 PM

[ 34 ]
Change type—Change the number to one of the 5 available types:
General, Mobile, Home, Work, or Fax (only available for numbers
stored in phone memory).
As primary no.—Assign the number as your primary number. See “Assign
a primary number” on page 35 for more information. (Only available
for numbers stored in phone memory.)
Add number—Add another number to the selected entry.
Add detail—Add an e-mail address, web address, street address, or
note to the selected entry.
Caller groups—Add the selected entry to one of the five available
caller groups, or select No group.
Send bus. card—Send a business card containing the selected entry
information to a compatible phone using IR or SMS.
Send message—Send a message to the entry using SMS or e-mail.
1-touch dialing—Assign the number to a 1-touch dialing location.
Edit name—Edit the name of the entry.
View name—View the name of the entry.
Delete—Delete the entry and all information it contains.
Edit names
1
At the start screen, select Names > Edit name.
2
Scroll to the name you wish to change and select Edit.
3
Edit the name as desired; then select OK.
Delete names and numbers
You can delete a single entry or all entries at once.
DELETE A SINGLE ENTRY
1
At the start screen, select Names > Delete > One by one.
2
Scroll to the entry you wish to delete and select Delete.
3
Select OK to confirm the deletion, or Back to return to the list of entries.
6340i.ENv1_9310019.book Page 34 Thursday, July 10, 2003 3:21 PM

[ 35 ]
Phone book
DELETE ALL NAMES AND NUMBERS
1
At the start screen, select Names > Delete > Delete all.
2
Scroll to either Phone or SIM card and select Delete.
3
Select OK to confirm the deletion, or Back to select from Phone or
SIM card again.
If you selected OK, you are prompted to enter the security code
(default is 12345).
4
Enter the security code and select OK.
Note: If you enter the wrong security code 3 times in a row, the
phone is blocked and will not accept a code for 5 minutes.
Assign a primary number
For names containing more than one number, assign the most-dialed
number as the primary number. The primary number is the number dialed
when you select a name for dialing that contains multiple numbers.
1
At the start screen, press one of the scroll keys to display a list of
phone book entries.
2
Scroll to a name containing multiple numbers and select Details.
3
Scroll to the number you want to assign as the primary number (or
change to the primary number) and select Options > As primary no..
The primary number is set.
Copy phone book entries
1
At the start screen, select Names > Copy.
2
Select either From phone to SIM card or From SIM card to phone.
3
Select one of the following options:
One by one—Select and copy entries one by one.
All—Copy all entries from the SIM card or phone.
Primary nos.—Copy only primary numbers. This appears only if you
select From phone to SIM.
6340i.ENv1_9310019.book Page 35 Thursday, July 10, 2003 3:21 PM

[ 36 ]
4
If you selected All or Primary nos., go to step 6. If you selected One
by one, scroll to the entry you wish to copy and select Copy.
5
Select either Keep original or Move original.
The entry is copied and you are returned to the list of phone book entries.
6
If you selected All or Primary nos. in step 3, select either Keep
original or Move original.
7
Select OK to confirm your choice.
All entries are copied to the selected destination. Select Back to
return to the list of phone book entries, or press the End key to exit
and return to the start screen.
Warning: Select Keep original if you are unsure of which copy
method to use. This ensures original entries are merely copied to
the new location. Move original deletes files after copying.
View service numbers
Your wireless provider may have saved service numbers to your SIM card.
To view these numbers:
1
At the start screen, select Names > Service nos..
A list of numbers, if available, appears in the display.
2
To view details of a number, scroll to the number and select Details.
Note: This feature may not be supported by your SIM card. If not,
contact your wireless provider for more information.
• CUSTOMIZE THE PHONE BOOK